|
INTRODUCTION With the successful completion of the cuir bouillied cuisses and armed with new knowledge as a result, I decided to return to working with smaller pieces and their trickier manipulation. I had intended to make a fingered gauntlet, similar to the famous Wisby gauntlets, but my experiments had made me a bit leery of trying this at my then skill level, as the hot working of the individual finger joints produced unpredictable results. Instead I decided to make a prototype mitten gauntlet for my right hand. (As my right fingers were taking a fair amount of combat punishment at this stage my motivation was high!). Once again, the lack of ability to rework the shaping of the plates when using cuir bouilli meant extra attention to pattern shaping, and heavy card templates were cut and taped to a pair of padded gloves to ensure coverage would be effective when the gauntlet was flexed. Note: the padded gloves are not period and are not used for the final gauntlet. They were used as a "form" as the padding gave a reasonable pre-shrinkage size for pattern pieces (I hoped!). |
|
| The pattern was adapted from Sir Paul Sommerton's1 pattern for steel gauntlets. This picture is of the plates and notes where dishing and fold-over occurs. (Each piece had to be sized for my hand and then a shrinkage allowance added.) |
 |
| This picture shows the cuff, and gives order of assembly instructions. |
 |
|
This series of photos shows the template pieces attached to the form-glove.
This view is from the top - all the plates lap the next correctly when hand is straight. |
 |
| This view is from the inner side - all the plates lap the next correctly when hand is straight. |
 |
| This view is from the outer side - all the plates lap the next correctly when hand is straight except the outer side of the second joint. The template was lengthened on that side. |
 |
| This view is from the side with the hand curled into a grip - all the plates lap the next correctly when hand is straight. Care will have to be taken with the shaping of the knuckle-plate to ensure the gap is just a result of the template's non-curvature. Inner side of third joint needs lengthening. |
 |
| This view is from the side in three-quarter view with the hand curled into a grip to check that the hand-plate underlaps the knuckle plate correctly when hand curled. |
 |
| This view is of the palm - ensuring that the third joint plate extends far enough past the ends of the fingers to allow riveting. |
 |
| This view is of the hand curled inwards to check that all fingers covered by third joint plate. Bend and dish marks adjusted slightly. |
 |
|
CUIR BOUILLING Materials Preparation
Cuir Bouilling
|
|
|
ASSEMBLING GAUNTLET Preparation The cuir bouilli pieces can be attached in several ways:
I chose to create a leather liner, rivet the plates on, pad this, and then permanently attach the lot to a fine pig-skin glove with the lining removed. What I wanted to achieve was high protection on the outside of my hand, and sure grip on the inside fingers and palm. In order to achieve this it was easier to pad the armour than the gloves - Sir Michael DeLacy's2 site provided useful ideas. |
|
|
Step One: Riveting Armour to Liner
|
|
| This view is of the riveting from the inside. Note that the third joint plate extends well past the end of the liner giving good coverage of finger tips. |
 |
| This view is of the riveting from the outside. There appears to be a gap between the outside end of the first and second joint plates but this proves not to be an issue when the gauntlet is assembled. |
 |
| The liner is curved as if the hand is gripping something and the coverage by plates is checked. |
 |
| The final check before moving on to the next stage of assembly was to attach the liner and armour to the real glove with rubber bands and then do the 'real life' movements the gauntlet will do, e.g., hold sword and move through wards and strikes - check for gaps and potential binding of movements. Adjust as necessary by re-riveting or very careful filing of plates. |
 |
|
Step Two: Padding the gauntlet
|
 Padding pattern |
| Final step is to lay the glove into the padding (remember the armour curves away from the glove so this is the easier placement) and some basting stitches made. The glove is then firmly sewn - through the padding - to the liner at key movement points. (The best way to establish these is to keep trying the combined unit on, repeatedly making the repertoire of movements it will face.) |
 |
| The glove fingers and back of hand are now armoured - top view. |
 |
| Side view - note that, as in previous picture, there is a gap in coverage around the web of the thumb. As this is consistent with the pattern, I decided not to worry about it unless problems arose in 'field testing' (they didn't). |
 |
As this gauntlet is a prototype I wanted a variety of hand sizes to be able to put it on. At the same time it needed to be stable, so I borrowed the final attaching points from armour which is simply strapped over gloves.
|
 |
| The last step in assembly is to rivet the third joint plate to the finger tips of the glove. This involves donning the glove and marking three riveting points which both allow your fingers to fit into the end of the glove and ensures that the plates will move in time with your fingers. Inside view. |
 |
| Outside view. The small gap between the outer edges of plates two and three which was identified at template stage remains despite adjusting the template. This suggests that either the original pattern was wrong or that it doesn't matter in practice. (So far it has not caused a problem in practice.) |
 |
|
WRIST PROTECTION The pattern called for the cuff to be made of leather with splint reinforcing. I decided to try making the cuff of cuir bouilli as well, with the later 'hour glass' shape in mind. I think this was a mistake - see 'Lessons' for explanation. The cuff was cut to pattern and cuir bouillied and a reasonable flare established. This was important as it has to fit over the sleeve of the gambeson. I hardened this piece more than the fingers both to maintain the 'flare' and to give the more frequently targeted area a higher level of protection. Picture is view from the from - flare is deliberately wider to the outside. |
 |
| The cuff shrank a bit too much for a comfortable fit over gambeson sleeve, so a joining-piece of plain 3 mm leather was riveted on. |
 |
|
Having chosen to cuir bouilli the cuff there was now a gap between the cuff and the back plate. (Had I followed the pattern the leather cuff would presumably been attached directly to this plate. This wasn't made clear and I didn't think of it.)
My solution was to cut a plate of plain 3 mm leather into an extra plate to cover the gap. This had the advantage of filling some of the gap between the thumb and fingers and also provided and extra layer of protection on the back of the hand. The photo shows the process of stitching the plate on - there was insufficient space to rivet inside the cuff. |
 |
| Sewn together - outside view. |
 |
| Inside view. |
 |
| Shaping added to give coverage of thumb web. |
 |
| Side view showing how new plate angles slightly upwards so that back plate can articulate under it.. |
 |
| The glove was then attached by sewing it at two points at the wrist to the extra backplate. The gauntlet is now complete - whew! |
 |
| View from the top of the completed gauntlet. |
 |
| View from left side. |
 |
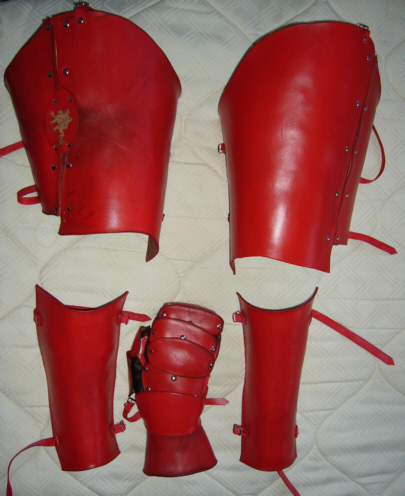
| View from right side. The gauntlet was later painted to match the rest of the armour. The gauntlet is between the demi-greaves. |
 |
|
LESSONS
|
|
|
FOOTNOTES 1 Sir Paul of Sommerton's (Patrick Woolery) pattern (http://web0.greatbasin.net/%7Efenwick/images/patterns/sir_pauls_gauntlets_1.jpg) found on Daniel Fenwick's page at http://web0.greatbasin.net/%7Efenwick/2 Sir Michael DeLacy (Mike Earl): http://www.eredsul.org/earl_mike/FlameWar/Gauntlets.htm 3 tip, second, first, back, knuckle, thumbs separately and then joined to body. |
|